

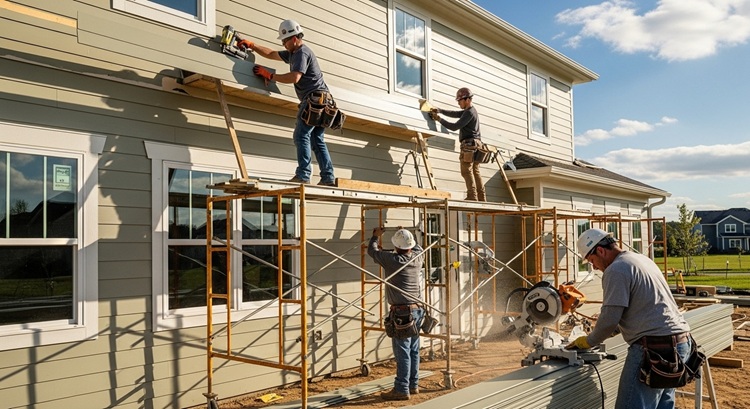
Fresh siding can make a home look brand new, but the real job of siding is less about curb appeal and more about control. Specifically, residential siding installation is designed to manage water, air movement, and temperature changes so your wall system stays dry, stable, and durable.
When installation details are rushed or skipped, moisture can slip behind the siding and get trapped. That’s when small “cosmetic” issues can turn into expensive repairs, including rot, mold, and damaged framing.
Siding is a water-shedding system, not a waterproof seal
A common misconception is that siding itself is the waterproof barrier. It’s not. Think of siding as the first line of defense that deflects most water, while the layers behind it handle whatever gets through.
A properly planned residential siding installation typically includes:
- A weather-resistive barrier (WRB), often called housewrap
- Flashing at openings and transitions (windows, doors, decks, roof lines)
- Proper fastening and spacing (to allow movement)
- Drainage and drying potential (so moisture can escape instead of lingering)
When those components are missing or installed incorrectly, water can end up where you least want it: inside the wall.
The most common installation errors that invite moisture
1. Bad flashing around windows and doors
Openings are the highest-risk areas on most homes. Common mistakes include:
- Missing head flashing (drip cap) above windows and doors
- Incorrect layering of WRB and flashing (water gets directed behind the barrier instead of over it)
- Over-reliance on caulk where flashing should do the real work
Caulk can help, but it should not be the primary waterproofing strategy. Caulk fails over time. Flashing, when installed correctly, is the long-term solution.
2. Incorrect clearances at the bottom edge
Siding needs adequate clearance from roofs, patios, decks, and soil. When siding is installed too close:
- Water can wick upward by capillary action
- Debris can block drainage areas
- Moisture stays trapped longer, increasing the chance of rot
This is one of the simplest details to get right, and one of the easiest to overlook.
3. Overdriven nails or “too tight” fastening
Many siding products expand and contract with temperature changes. If nails are driven too tight or placed incorrectly:
- Panels can buckle, crack, or warp
- Seams can open up
- Water pathways can form behind the siding
A clean-looking install on day one can still fail prematurely if the fastening pattern is wrong.
4. Blocked drainage features
Some siding profiles include weep holes or channels that allow water to drain out. Painting over them, caulking them shut, or packing them with debris can trap moisture behind the siding.
If water gets in, it needs a way out.
5. Skipping wall prep and ignoring existing damage
New siding should never cover up old problems. If installers don’t address:
- Rotting sheathing
- Soft framing
- Wet insulation
- Mold or persistent staining
…you’re essentially sealing in damage and setting the stage for faster deterioration.
Early warning signs of moisture behind siding
Moisture damage often starts inside the wall, so you may not see obvious clues right away. Watch for:
- Peeling paint or bubbling trim near windows and doors
- Musty smells, especially after rain
- Interior drywall staining on exterior walls
- Soft spots when pressing on trim or lower wall areas
- Increased insect activity near damp wood
If you notice more than one of these, it’s worth having the exterior evaluated before the issue spreads.
How moisture turns into structural damage
Trapped moisture can cause a chain reaction:
- Sheathing deteriorates (OSB and plywood can swell, delaminate, or rot)
- Fasteners corrode (reducing holding power and stability)
- Framing weakens over time (slow rot can compromise studs and plates)
- Mold risk increases (especially where airflow is limited)
This kind of damage is typically progressive. The longer it goes unnoticed, the more invasive the repair becomes.
A homeowner-friendly checklist before a siding project
Before you hire someone for residential siding installation, ask these practical questions:
- How will you flash windows and doors? Ask for a simple explanation, not jargon.
- What WRB will you use and how will seams be sealed?
- How will you handle existing rot or damaged sheathing if you find it?
- What clearances will you maintain from grade, roofs, decks, and hard surfaces?
- Will you document key steps with photos before the siding goes on?
A reputable installer should be able to walk you through these steps clearly. If the answers are vague, that’s a signal to slow down and get more clarity before work begins.
Bottom line
A quality siding product matters, but installation quality matters more. The best-looking siding in the world can’t compensate for missing flashing, poor wall prep, or trapped moisture.
A solid residential siding installation assumes water will happen and builds in a plan for it: deflect, drain, and dry. If those fundamentals are handled correctly, your siding is far more likely to look good and perform well for the long haul.